Nobody panic.
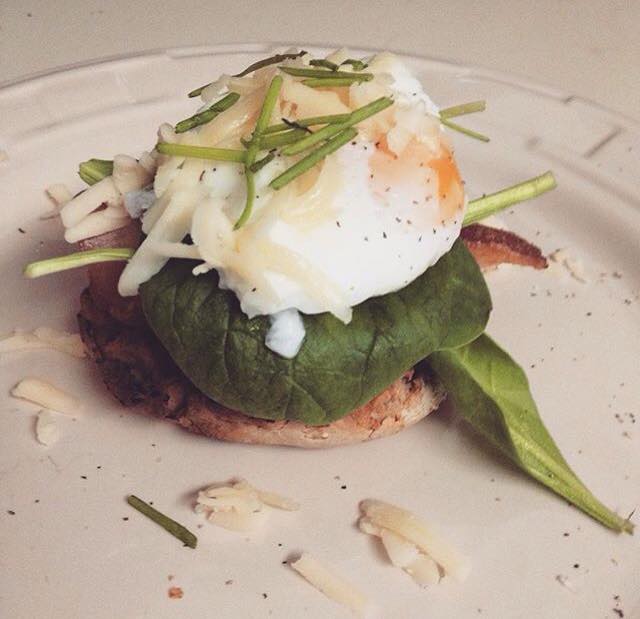
You’ve seen them glistening atop avocado toast or completing a particularly sexy egg and bacon sandwich. You’ve ooh’d and ahh’d over their perfectly runny yolks enhanced by Instagram filters and ideal lighting, and read dozens of articles on how to properly cook them. But the fact remains: poaching an egg is an intimidating task, even for the most savvy of home cooks. Just the name – ‘poached’ egg – conjures up images of Ina Garten, bathed in a holy white light, coaxing idyllic farm-fresh eggs into a gently swirling pot while Vivaldi plays soothingly in the background. It brings to mind Julia and Jacques laughing conspiratorially over succulent salmon and pears poached in red wine, delighted to hold the secret to one of the more impressive culinary tricks. Who am I, you ask yourself, a mere mortal, to attempt that level of egg greatness? Never fear: even the most timid of cooks can poach an egg without dissolving into tears or existential crises.
Poaching an egg is a deceptively easy skill masquerading as a difficult test of cooking prowess. By following these simple steps, you will soon be able to poach an egg without the slightest pang of anxiety.
Step 1 – Admit Your Fear
Eggs, like wolves and babies, can smell fear. The first step to successfully poaching an egg is to take a deep breath and accept your trepidation. Though harrowing visions of broken yolks and waterlogged scrambled eggs haunt you, you must set aside your fears and set your sights on victory. You can and will overcome your egg-related terror, so dig deep and uncover your culinary confidence.
Step 2 – Ready the Troops
In order to poach an egg, you will need a functional stove and the following:
• A wide pot that you would trust with your life, filled with 3 to 4 inches of water.
• One or more eggs, depending on your needs and level of confidence.
• 1 tablespoon of white distilled vinegar.
• A bowl or measuring cup.
• A slotted spoon.
And, finally:
• The courage of a thousand men.
Once you’ve gathered the aforementioned supplies, you may move on to the next step.
Step 3 – Prep
Set your pot, filled with 3 to 4 inches of water, over medium high heat. You are waiting to see small bubbles that indicate simmering. Under no circumstances should the water be brought to a boil! You may salt the water if you like, but it isn’t necessary.
While your water is coming to a gentle simmer, crack an egg into your bowl or measuring cup. There’s no need to season it at this point – that comes later.
When you see tiny bubbles rising in your pot of water, i.e. a light simmer, it’s go time. Proceed – with caution! – to the next step.
Step 4 – Splish Splash, An Egg in a Bath
Take one tablespoon of white distilled vinegar and add it to the pot of simmering water. This step is crucial, as the acid from the vinegar aids in coagulation, and holds the egg together in a perfectly plump, poached package.
Once the vinegar is added, take your bowl or measuring cup with the egg and get it as near to the water as you can without submerging it or scalding your hand. Slowly and carefully slide the egg into the water. Don’t dump it carelessly, take your time and insure that it has a gentle descent into its bath.
As soon as the egg is in the water, you must spring into action! Take your slotted spoon and, without actually touching the egg, gently stir around the inside edge of the pot until a whirlpool is created. This action is vital because it wraps the white of the egg around itself, guaranteeing a picture-perfect parcel of egg and making sure that it does not stick to the bottom of the pot.
Once the whirlpool is achieved and you can see that the yolk is ensconced by the white, move on to the most difficult step:
Step 5 – Wait
That’s right, wait. Don’t bother that egg for a whole 2 minutes. Don’t poke it, prod it, stir around it, lift it – don’t even look at it, if you can help it. It’s in there doing its little poached egg thing, and it needs privacy. Art takes time!
The only thing you are allowed to do before moving onto the next step is make sure the water doesn’t come to a boil.
Then, when two minutes have come and gone, move on.
Step 6 – Retrieval
Take your slotted spoon and carefully lift the egg from the water. The consistency should be bouncy and taut, with a delicate, oozing yolk. But before we get to any oozing at all, you need to set the egg down on a paper towel for drainage and season to your liking with salt and pepper.
Step 7 – Savory, Sensational Victory
Congratulations: you’ve poached your first egg! You’ve entered the hallowed halls of poaching perfection, and to the victor go the savory spoils. Go ahead and build a breathtaking eggs Benedict or add a glistening jewel of white and yolk to a bowl of hearty polenta. Bathe in the glory that is simple, easy egg cookery: you’ve earned it.